Placing An Order With CatPrint
If you’ve never ordered prints before, it can feel like there are a lot of decisions, but once you break it down, the process is actually simple. Our Customer Service Team walks customers through this every day, and most people are surprised by how quickly it all comes together. Review our blog post for a step-by-step guide, or continue reading below.
1. Uploading Your Files
When uploading your files, you can drag and drop the files into your file library, or upload them from your computer. You can upload a single file or multiple files at once. Once you have selected your file, the uploading will begin to your file library. When the file is completely uploaded, you'll need to check off the box to the left of the file name then choose the green button "Add Files to Job" to attach them to your job.

2. Selecting Your Job Type
Next, select your job type. You'll have the option to choose one of the listed common size job icons, or you can enter your specific print size by selecting the "custom size" icon at the top of the list.

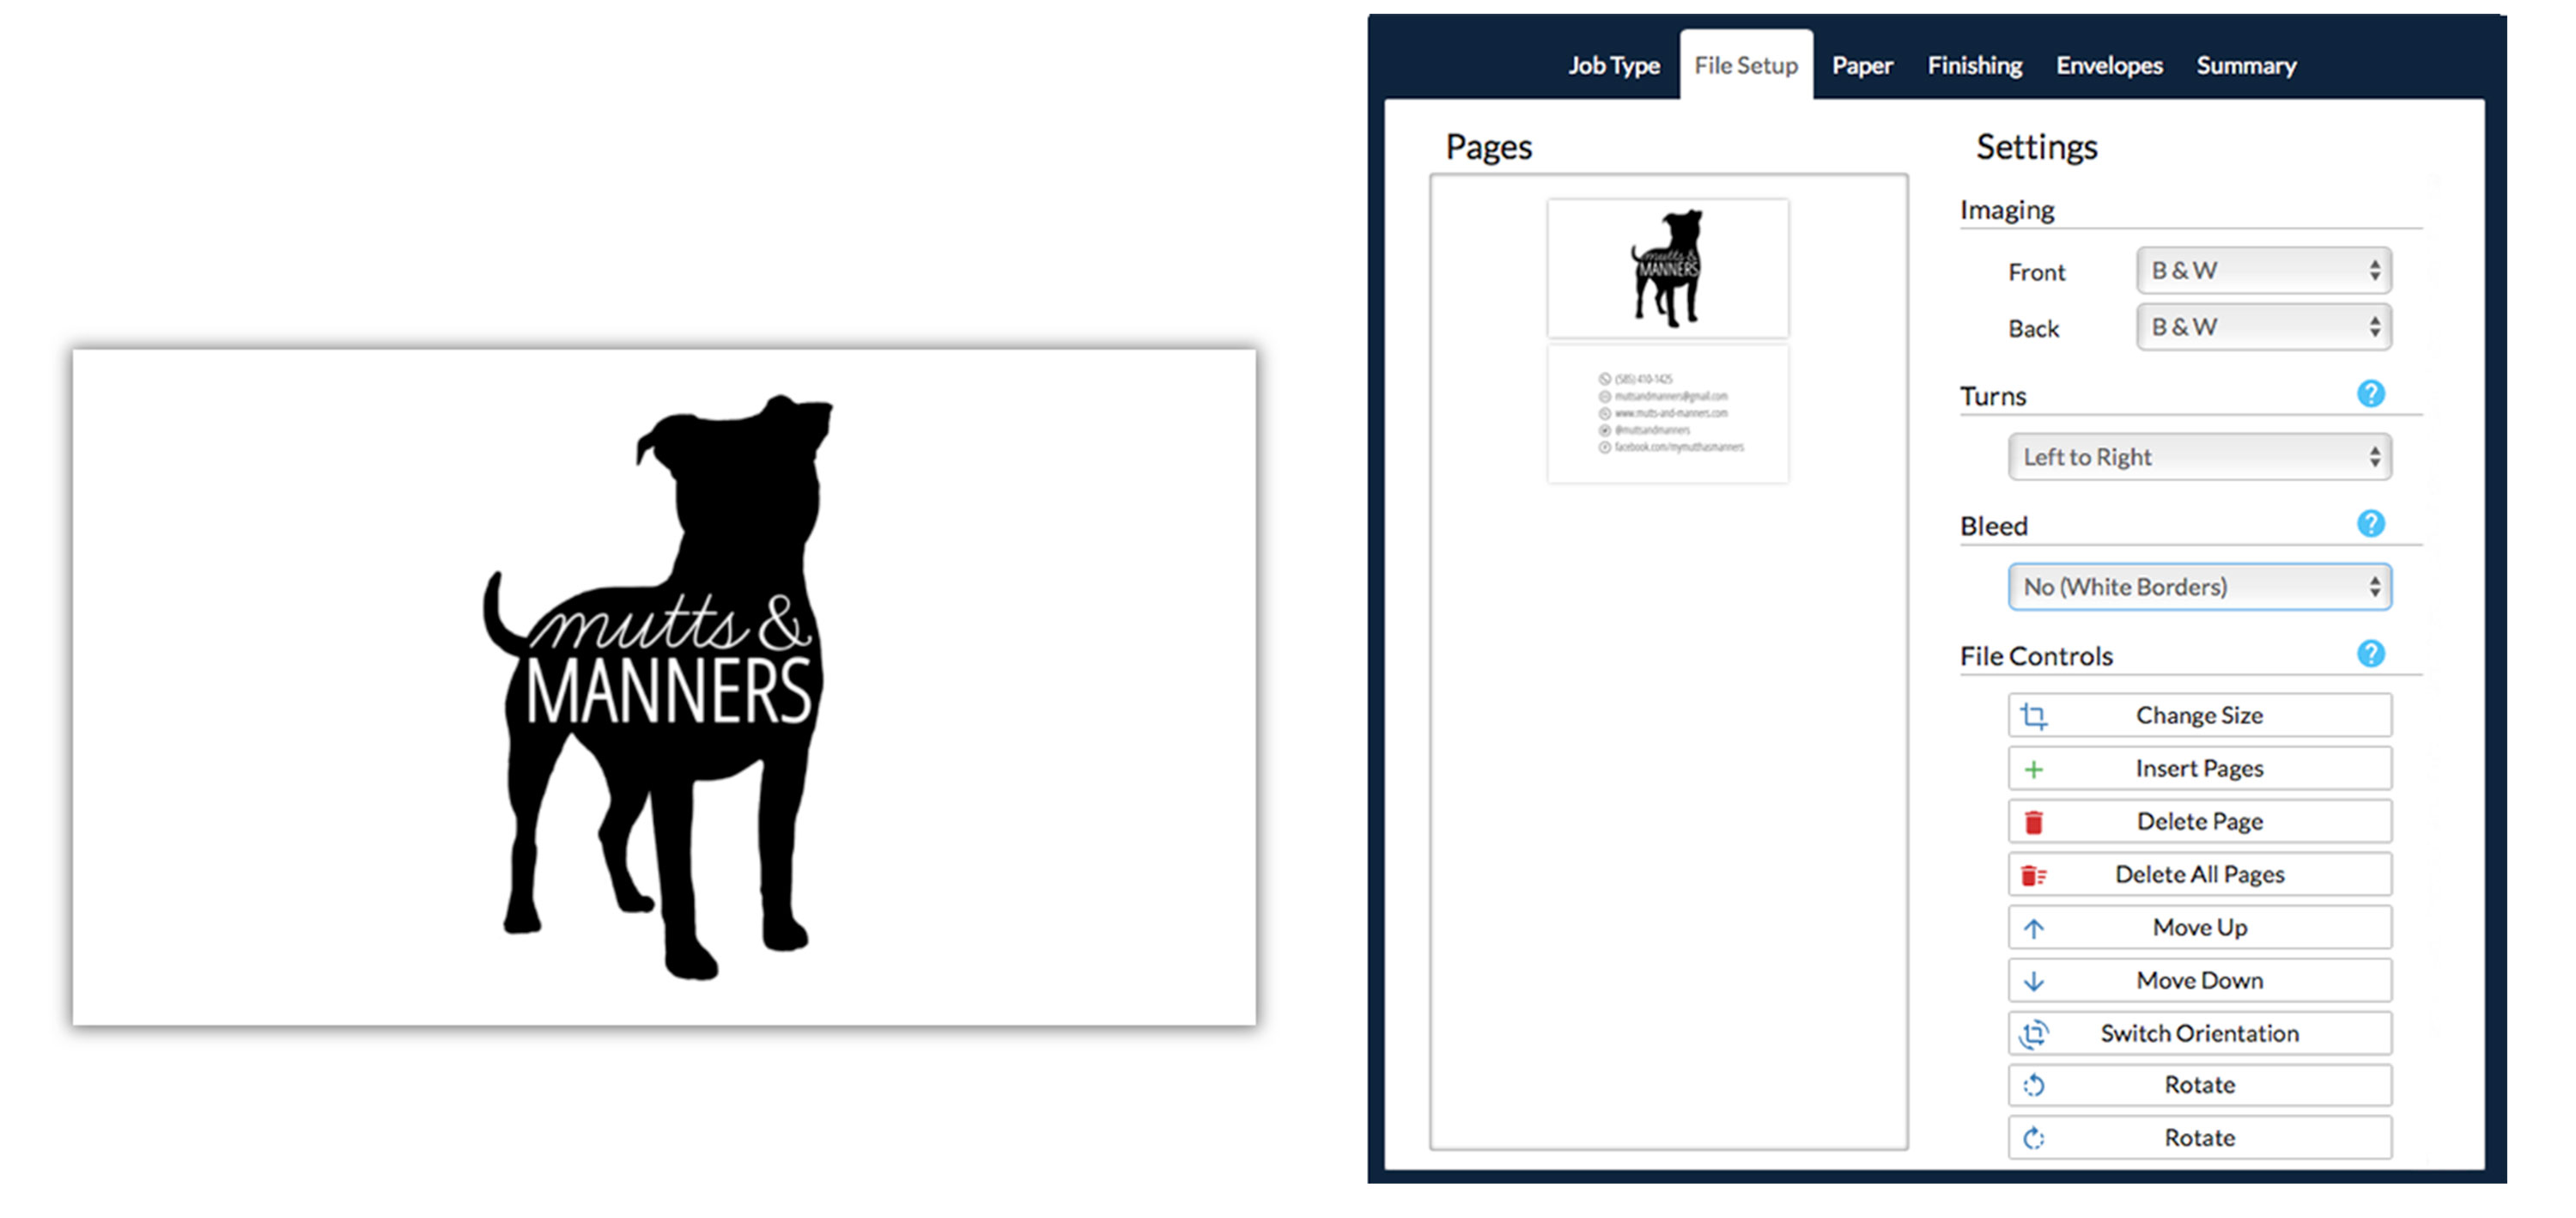
3. File Setup
Now, review your file setup! On the right, you'll see the options to insert more pages, delete pages, switch the orientation of the files, and more! You'll also need to specify your imaging and full bleed option.
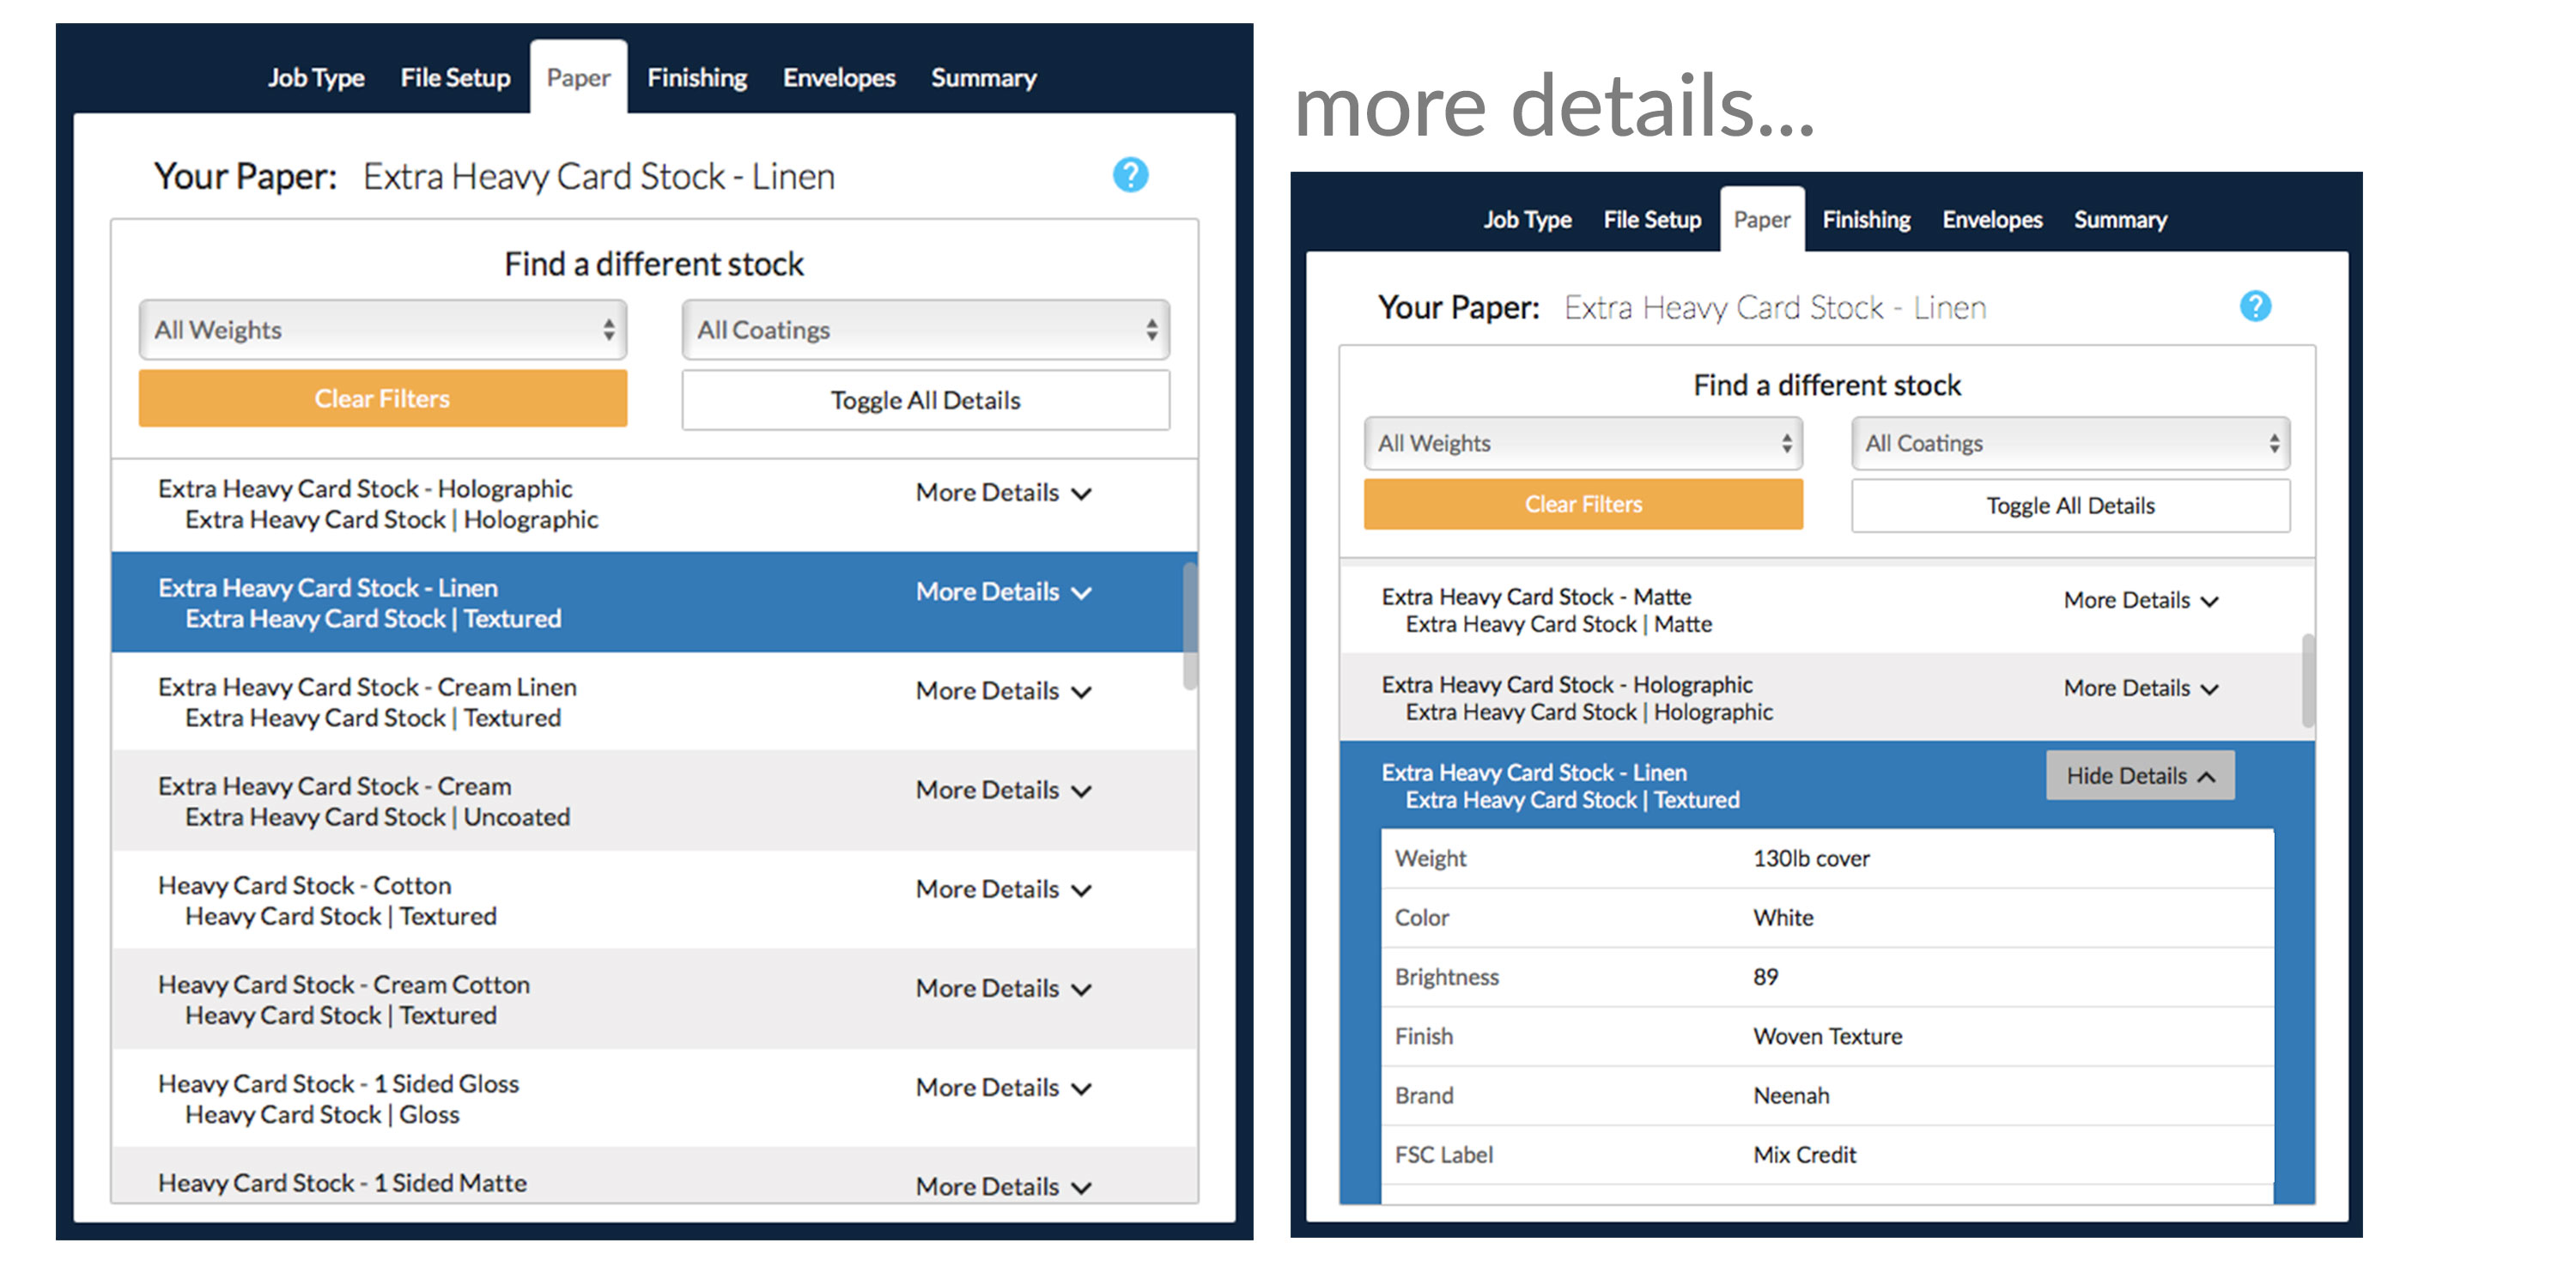
4. Select Your Paper
Next, select your paper. There are sorting options by paper weight and coating to help with the decision. Once you know the paper type you'd like to use, simply click on the paper name to highlight your choice. You can also view more details by clicking on the option to the right of the paper name.
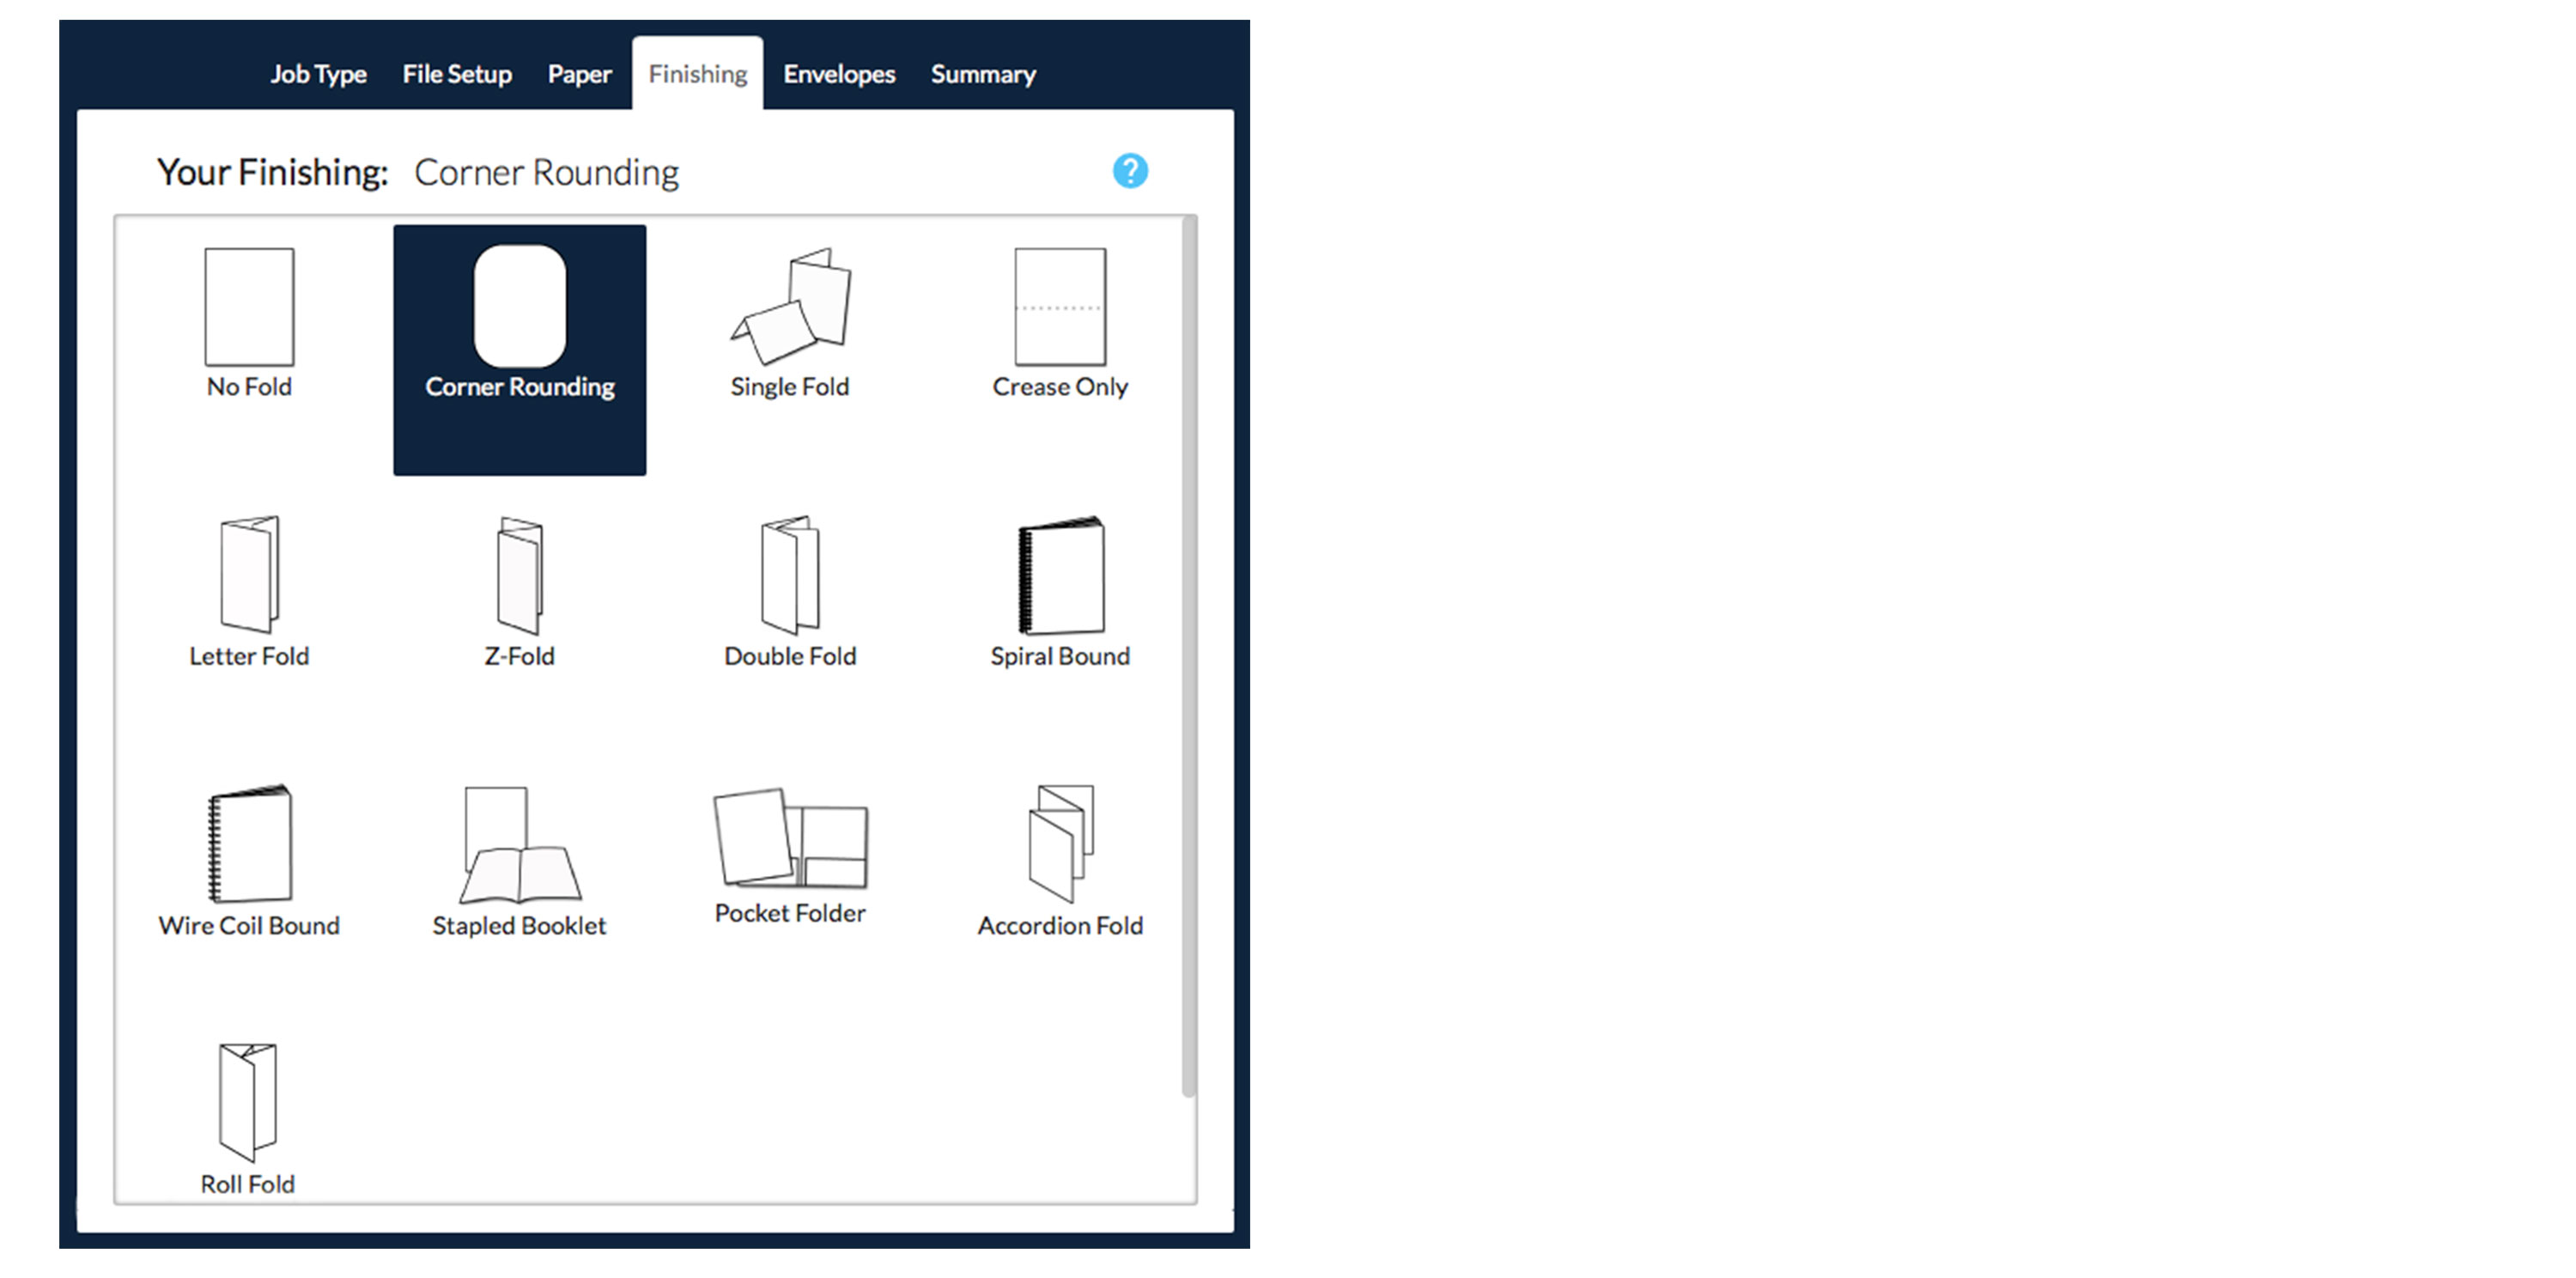
5. Finishing Options
In this step, you can select your finishing options like corner rounding or folding. If you have a finishing option in mind but do not see it listed, please contact us! If you do not wish to add a finishing option, please select no fold.
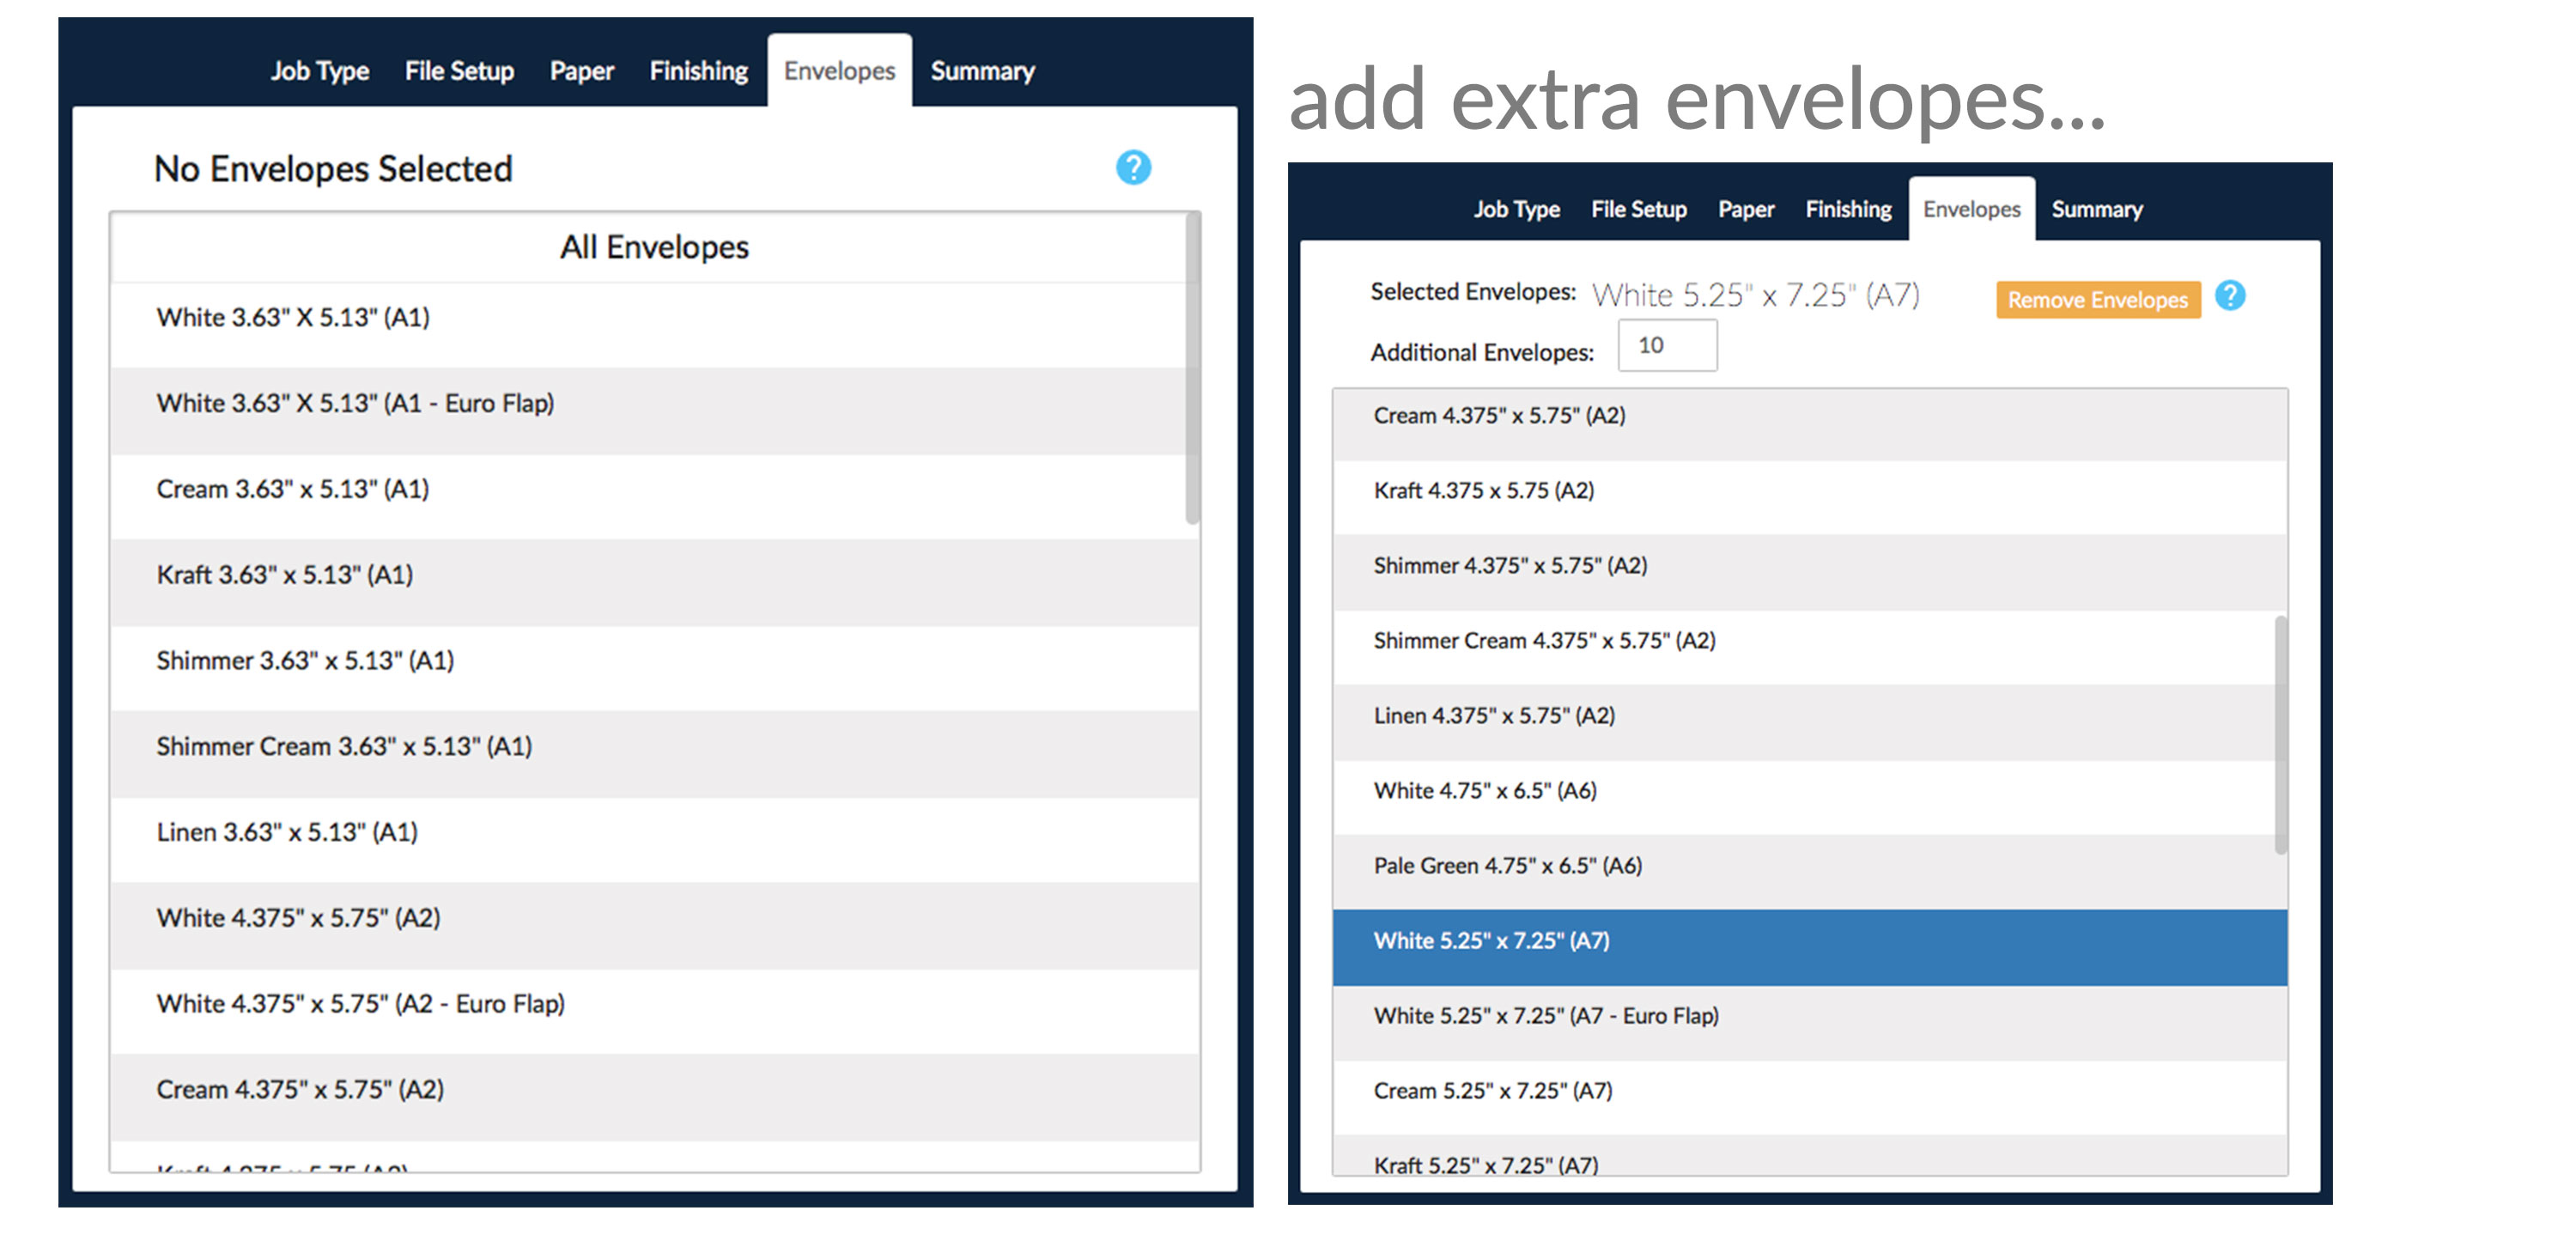
6. Envelopes
In this step, you'll have the option to add envelopes to your job. The envelopes are sorted by size (smallest to largest), and the best-recommended envelope size based on your job type. Once you've selected your envelopes, you can add additional envelopes if needed.
7. Summary
Next, you'll need to review the summary of your job specifications before adding the job to your cart. You'll be able to see your file setup, paper, finishing, envelopes, and quantity selections. Please note that both quantity and price are shown at the bottom of each tab. The quantity for your job can be changed at any point during the ordering process!

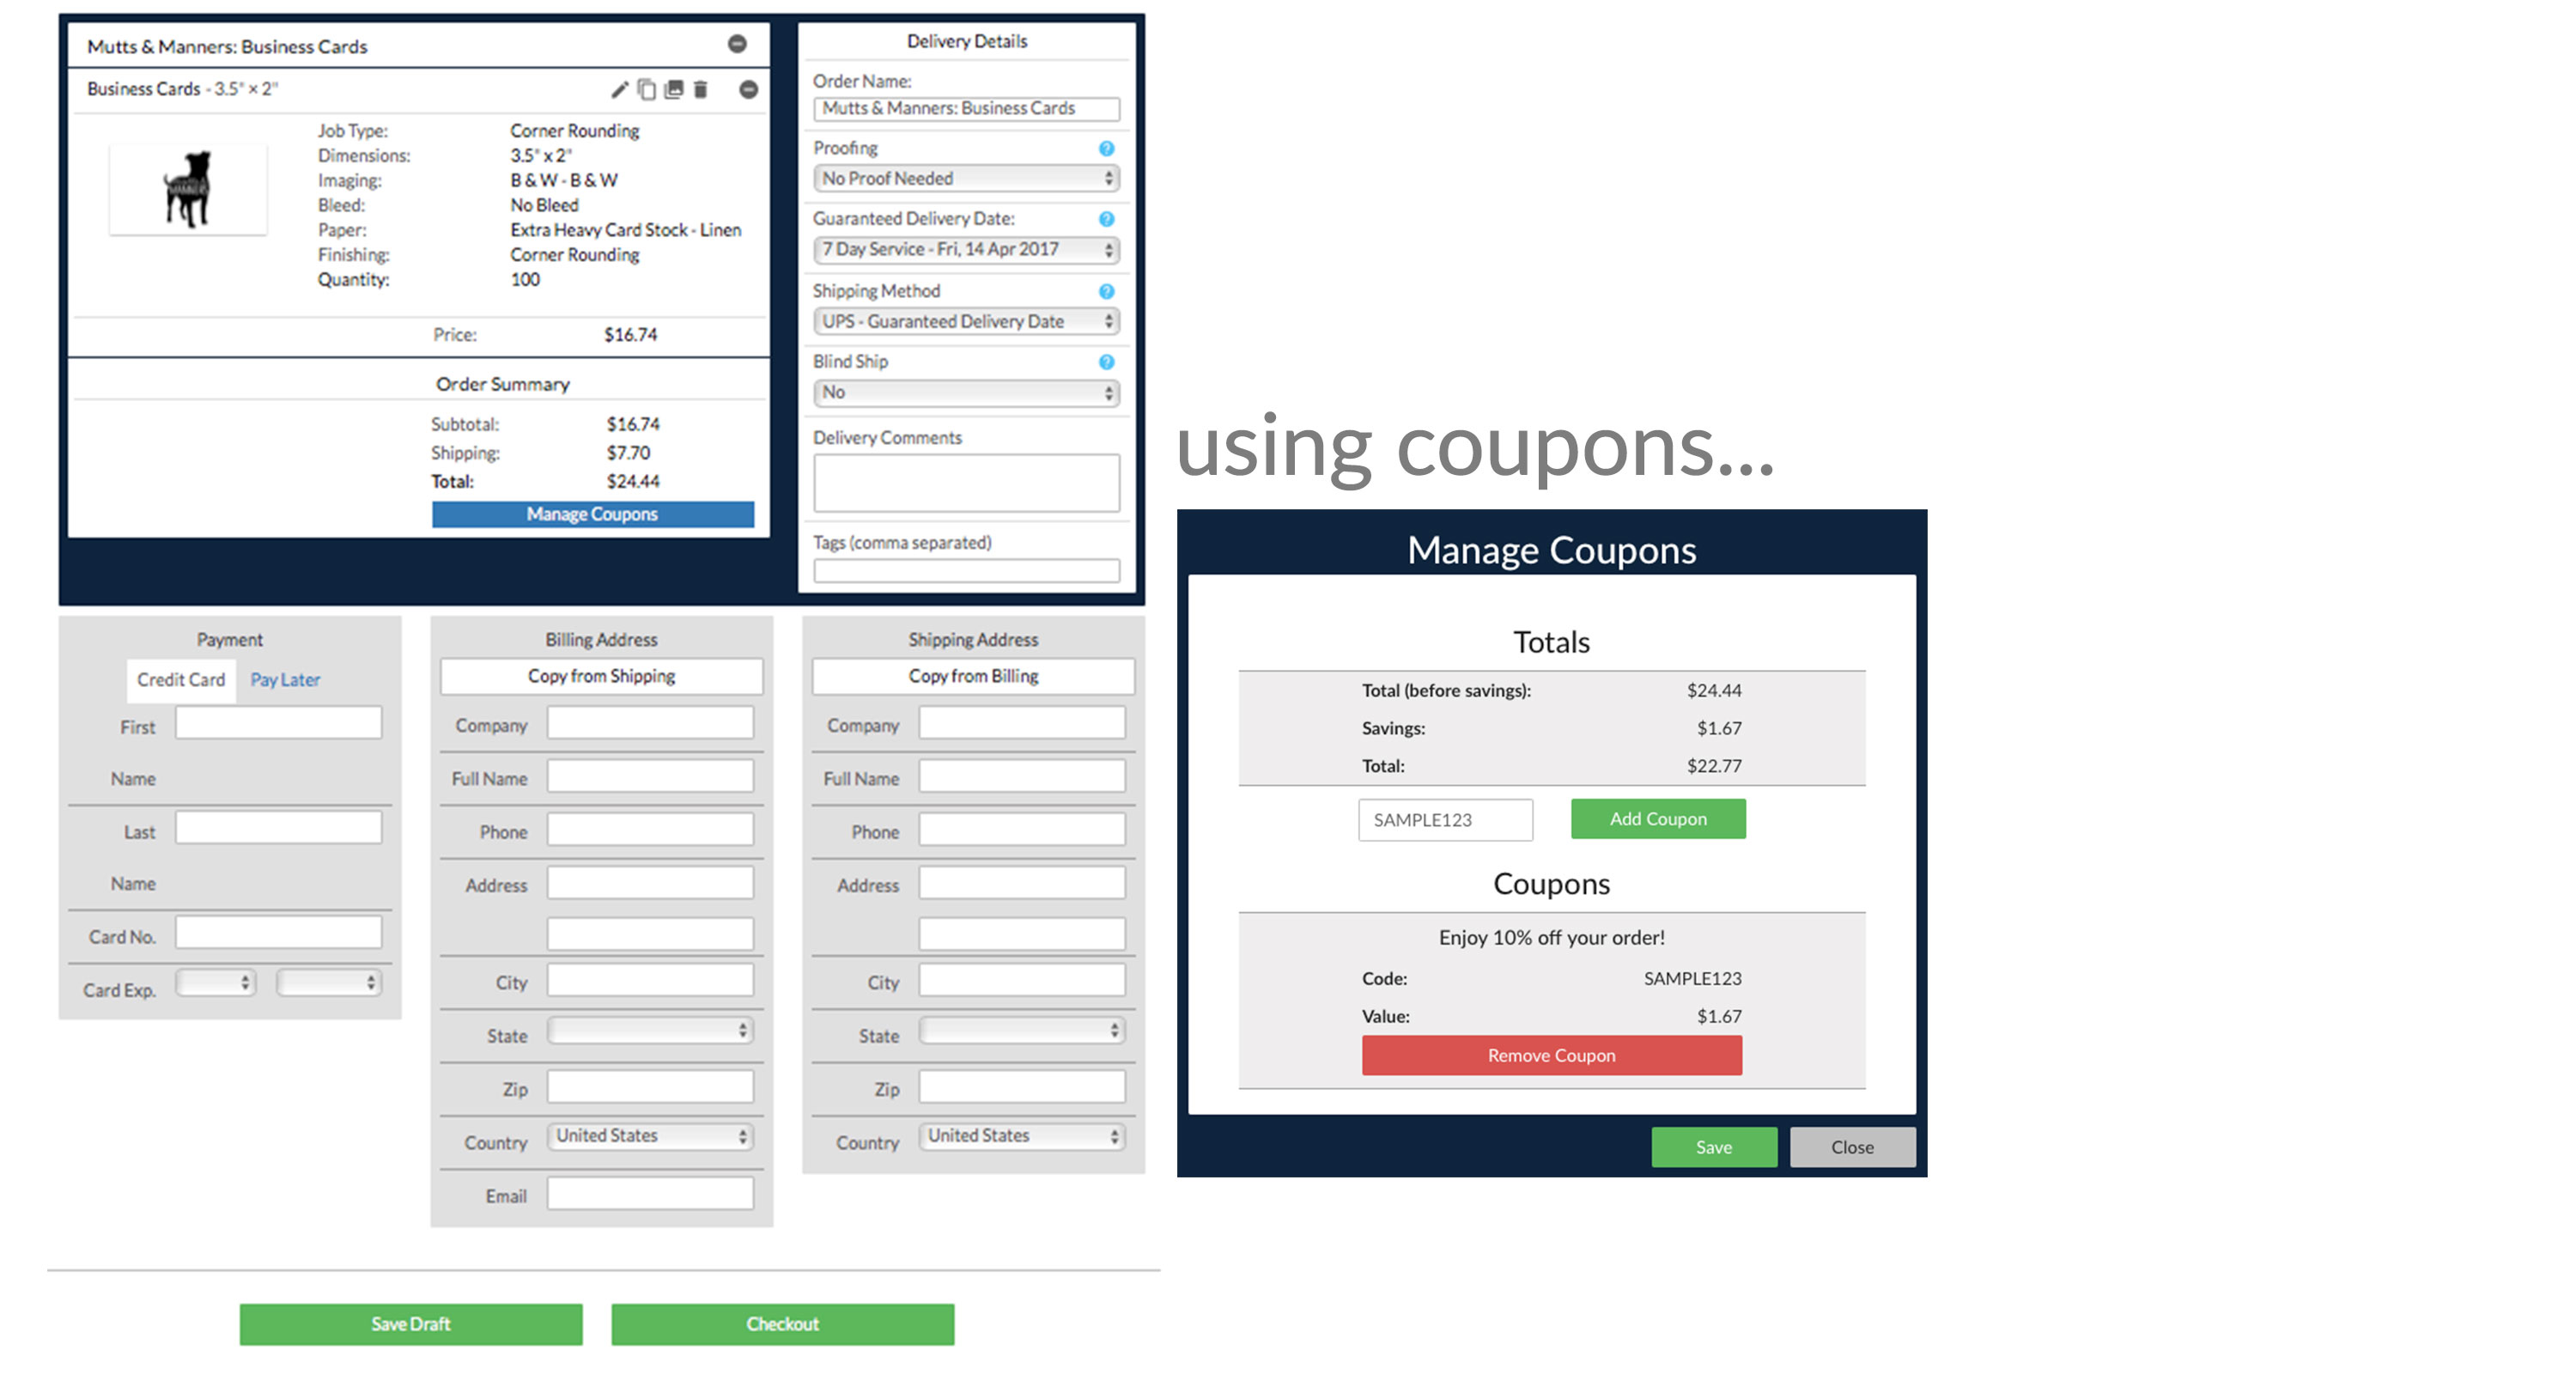
8. Your Cart
Once you've added your job to your cart, you'll fill out your payment information, billing, and shipping addresses. Here you can also add another job, edit a job in your cart, apply a coupon, and choose to receive a hard copy proof! After this information is complete, go ahead and select checkout! You will then receive an email confirmation with your order number. We always encourage customers to review this confirmation email and contact us immediately with any questions or concerns!
 </div>
</div>
</div>
</div>
</div>