Help & Information
Our Products
Wedding Stationery Invitations Art Prints Envelopes Greeting Cards Business Cards Booklets Brochures Flyers Pocket Folders Postcards PostersSpecialty Products
Foil Printing Holographic Prints Printed Envelopes Custom Stickers Die-Cut Shapes Wedding Invitation Sleeves White Ink PrintingTutorials
Setting Up Your Files Templates Full Bleed vs. No Bleed Paper Types Foil Printing Tutorial Variable Data Setup Sticker Setup Die-Cut Shape Setup Custom Packaging Slips How to Place an OrderGeneral Information
Frequently Asked Questions Free Hard-Copy Proofs Request a Sample Pack Artist of the Month Referral Program Shipping Options Holiday Schedule Content Guidelines Order Issues and Support Privacy PolicyAbout Us
Why Choose CatPrint? CatPrint Cares Our Foster Animals Environmentally Friendly Contact Us- Tutorials & Setup
- Die-Cut Shape Setup
Die-Cut Shape Setup
Designing custom die-cut shaped prints is an exciting way to bring your ideas to life and setting up your files doesn’t have to be complicated. With just a few key files prepared correctly, we can ensure your prints are produced cleanly, cut precisely to shape, and finished the way you envisioned.
To learn more about our Die-Cut Shapes, please visit our Die-Cut Shapes page.
Request a Free Sample PackFile Setup
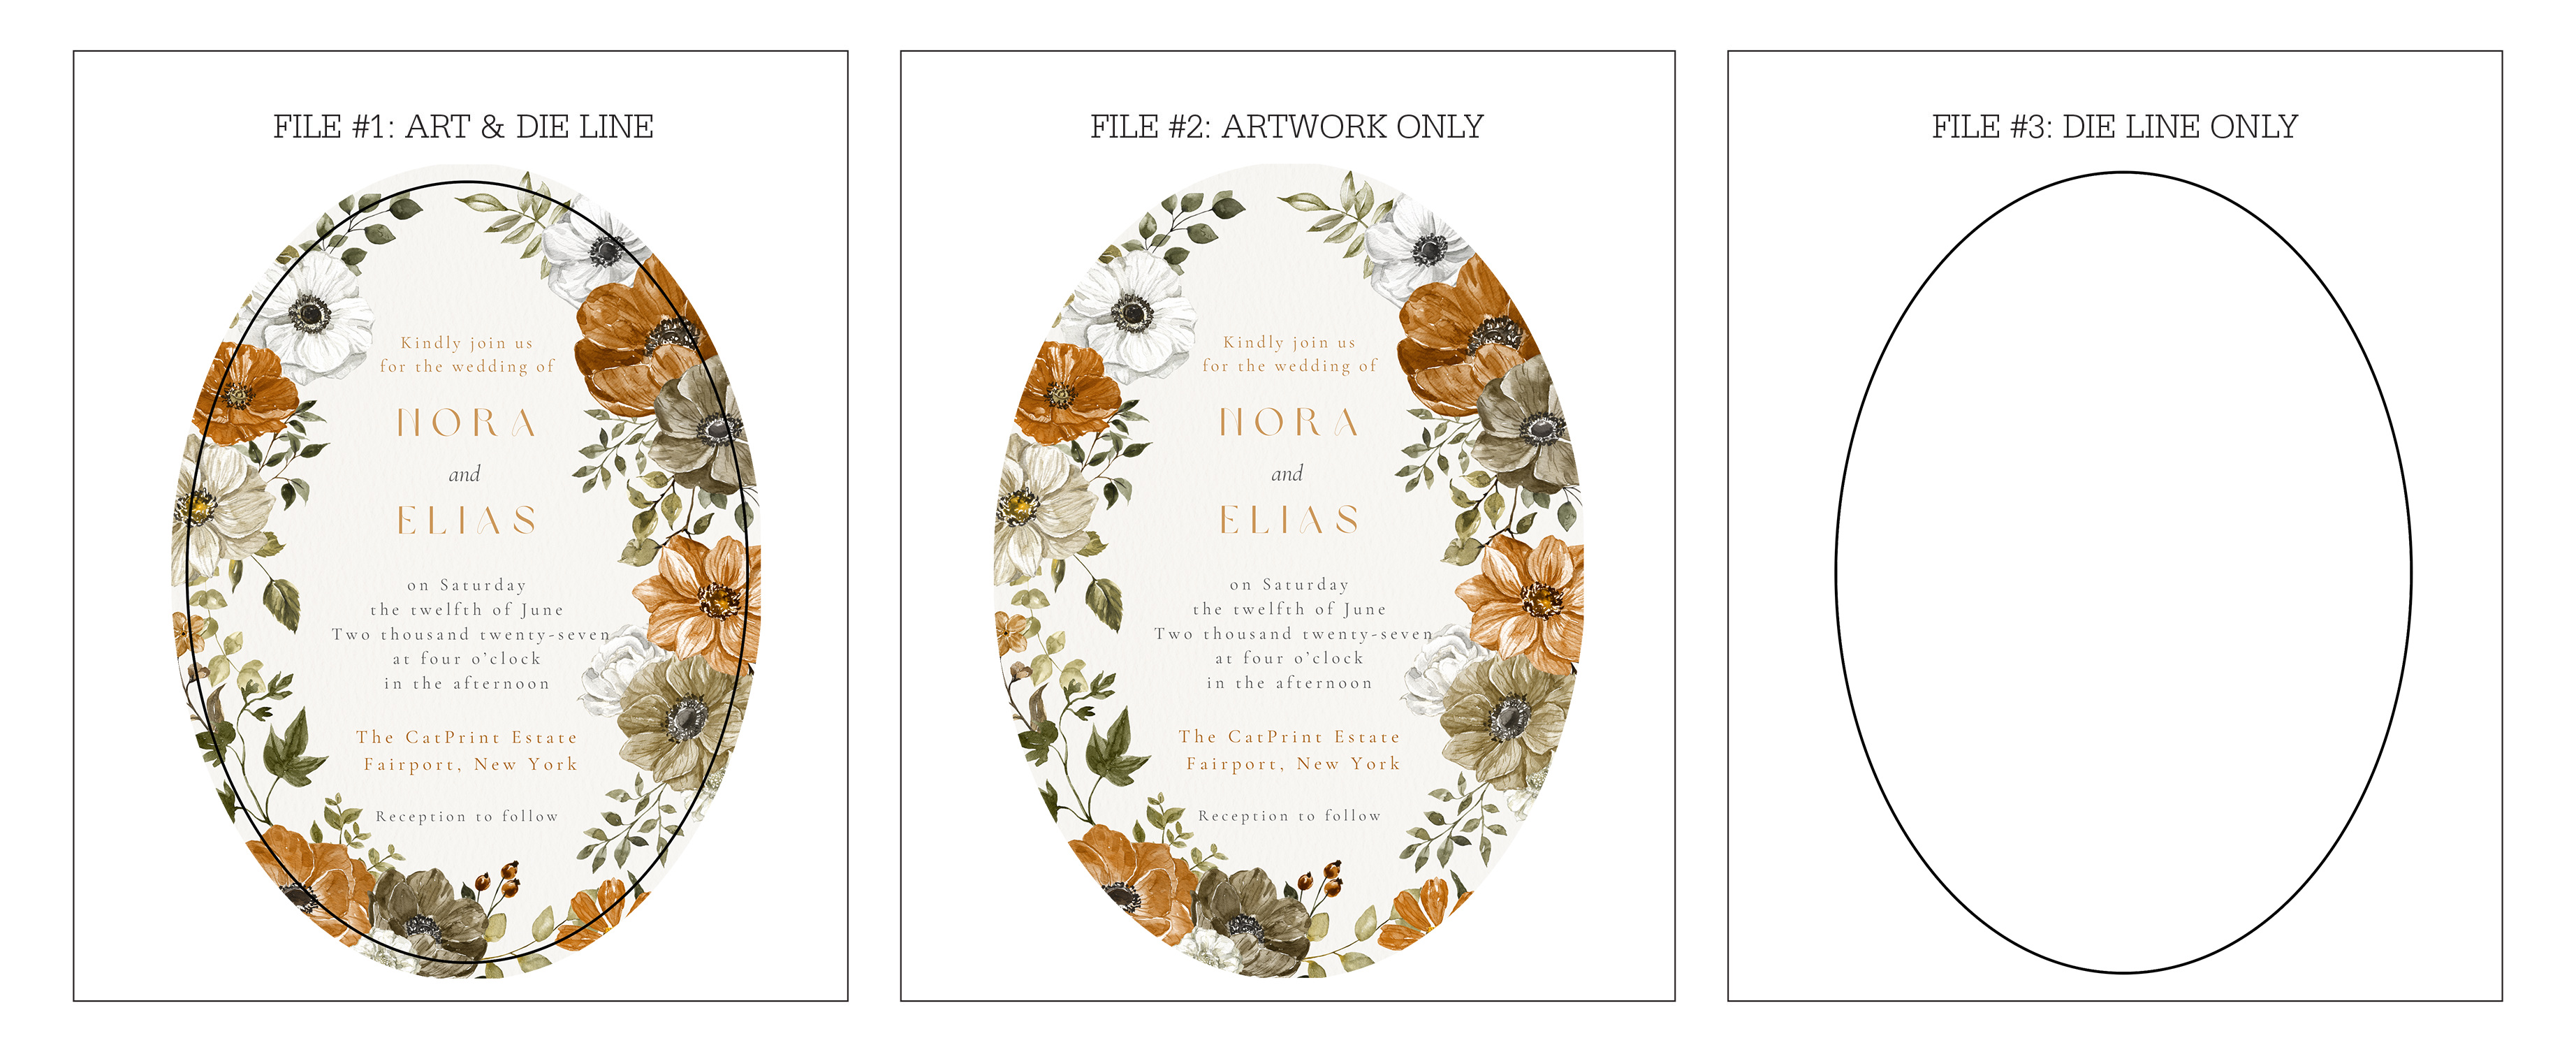
You will need to provide 3 files:
- File #1: This should be a file with both your artwork and die line.
- File #2: This should be a file with your artwork only.
- File #3: This should be a file with your die line only.
Full Bleed Setup
Make sure your artwork is properly setup for full bleed and extends 0.125" beyond the die line. To learn more about full bleed setup, please visit our Full Bleed page.